Shade Sails Installation Suggestions
Design and Layout:
| SUN SAILS CAN BE INSTALLED IN MANY WAYS | ||
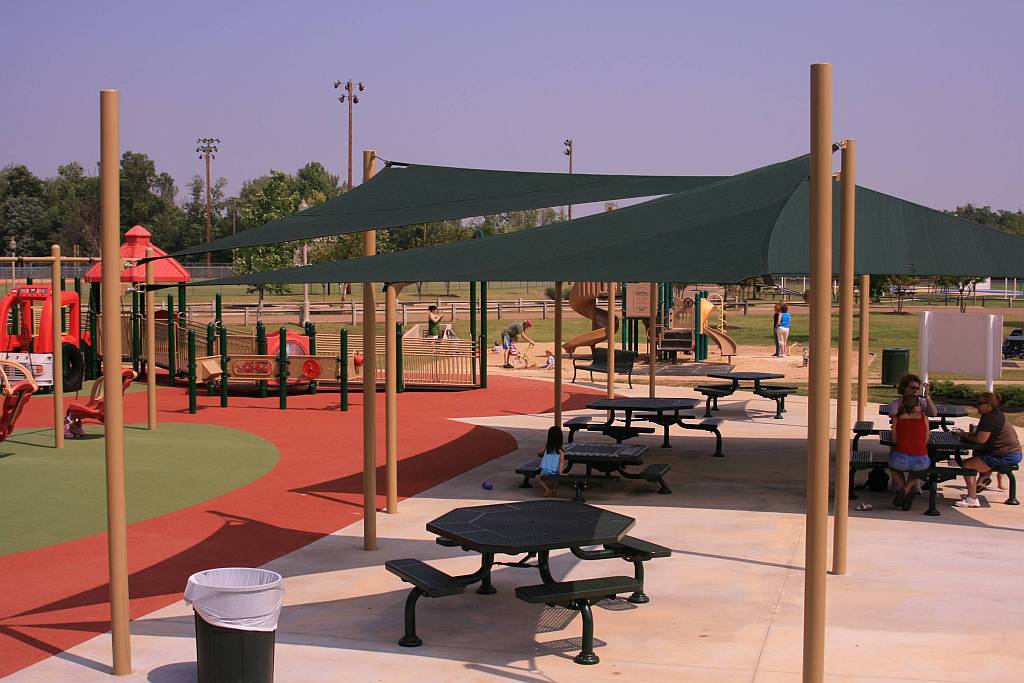
Horizontal Shade Sail | 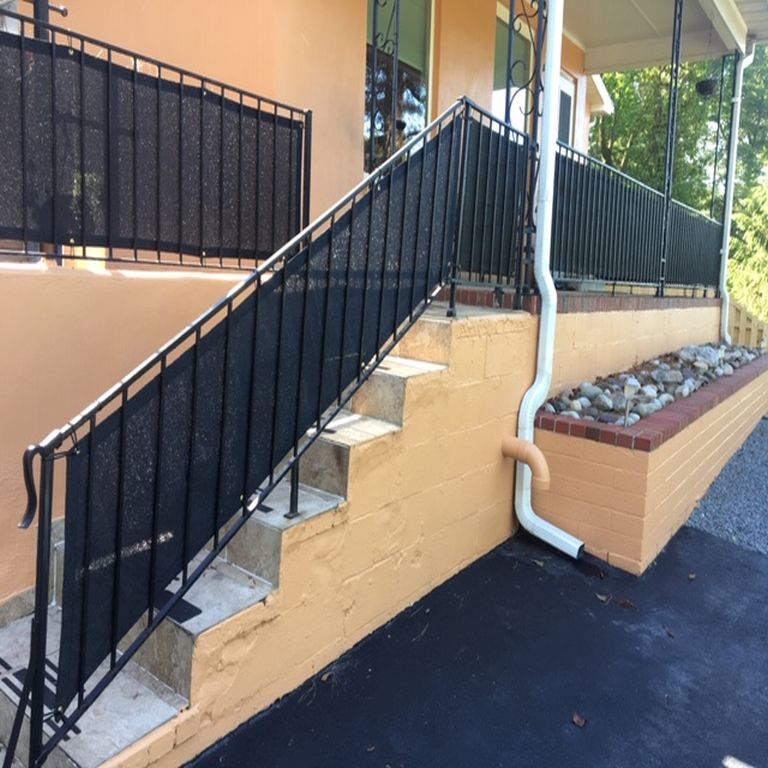
Shade Fabric Privacy Screen | 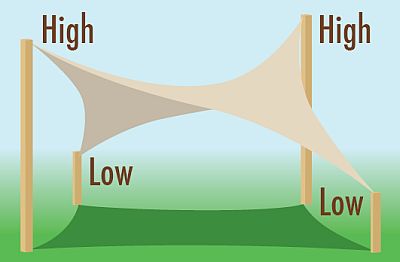
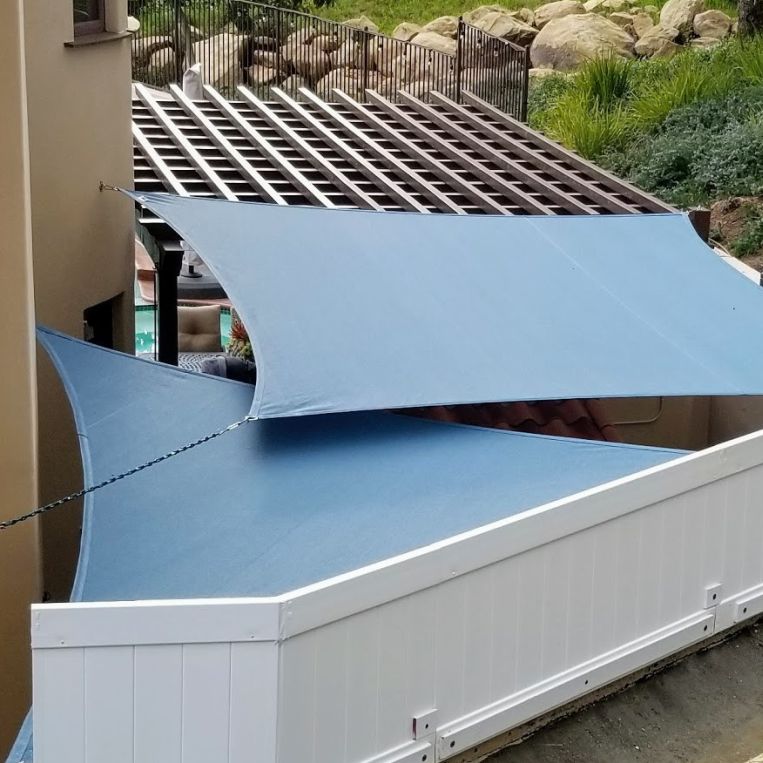
Hypar Shade Sail Design |
Shade Sails Installation Tips and Recommendations: Shade Sails can be mounted in a variety of ways:
- Horizontally (flat), where all corners are at the same height;
- Vertically, like a privacy fence;
- Or, where some corners are high and some low (like a “Hypar” design).
Shade sails installation is a very simple process. A horizontal, flat sail can be boring to look at, while a vertical sail will catch more wind and produce heavier loads. The most visually appealing situation is when two or more shade sails are used and the elevations of the sails change drastically from corner to corner. Setting a minimum slope of 18 degrees is ideal. This slope creates a run-to-rise ratio of 10ft / 3.25ft. In other words, if the support poles are 10ft apart, then the attachment point of one side needs to be a minimum of 3.25ft higher than the other to achieve the 18 degree slope. Prior to shade sail installation, check with local authorities for any relevant building regulations which may exist, and check with the local utility companies for any underground services prior to digging holes for the support posts.
Selecting The Position:
Before you commence installation, it is very important that you consider the most suitable location for your shade sails. Take into account the following:
- Size of the shade sail(s);
- Strength of existing structures intended to be anchor points;
- Ability to insert suitable posts with attachment points;
- Location of barbecue grills and firepits;
- Sun direction;
- Wind speed and direction.
There could also be other factors specific to your situation which require consideration. Note: Shade sails should not be used near an open flame. Do not use your barbecue grills or firepits under the shade structure. In determining the location for your shade sail, it is important to keep in mind the movement of the sun across the sky throughout the day. The shade, of course, will move as the sun moves. As a result, you will only have shade directly under the shade sail at midday during mid-summer. Once you have identified the location for your shade sail, it is important to determine the most suitable mounting points for the corners.

Some of these attachment points might already exist — for example, a pergola, large tree, fence post, or fascia. If enough attachment points are not already available, posts may need to be installed. When you are figuring out the size of the shade sail, take the following in consideration. On each side of the sail, you should allow a space between the corner of the shade sail and the mounting point that is at least 10 percent of the shade sail’s length. For example, if one side of the shade sail has a length of 120 inches, allow at least 12 inches of space between the corner of the shade sail and the mounting point. This will provide enough room for mounting hardware, material stretch, and tensioning of the sail. This should be done for each side of the shade sail to ensure there is adequate room to tension the sail properly. This is necessary for proper shade sail installations. This stage of the installation is critical. You should ensure all attachment points are structurally sound, and, if you are unsure, obtain independent advice from a builder or engineer.
Step by step instructions when you supply Mighty Covers with your shade sail mounting point measurements:
1) Install attachment rings or hooks to your building, posts or other structurally strong supports. This can include but is not limited to pad eyes with rings, lag bolts or threaded rods with rings. When using pad eyes with screws on the fascia boards of a house, you must use screws long enough that can go through the fascia boards into a structural board like a rafter tail. If you need to put an attachment point in between rafter tails, you will need to remove the fascia board to put a support board between the rafter tails and then replace the fascia board. 2) Since we were supplied your mounting point measurements, we reduce the shade sail size to allow just enough room for the mounting turnbuckles and spring clips (carabiners). These are needed to properly tension the shade sail once it is installed. For a triangle shade sail, there is one stationary attachment for a spring clip (carabiner) and two turnbuckles for the other two corners. For a quad or 4-sided shade sail, there are two stationary spring clips (carabiners) and two turnbuckles for the other two corners used to attach and tension the sail. 3) There is an order in which you should connect the individual corners of the shade sail to the attachment points. First you can easily attach the spring clip(s) from the attachment point to the d-ring of the shade sail since there is no pressure or tension on the shade sail at this point. Then attach the next corner that will be using a wide-open turnbuckle to connect the d-ring to the next attachment point. You should be able to connect this one by hand with a good pull. But on the last corner, you will need a come along or something to help connect the last wide-open turnbuckle. Please note: Always put the two turnbuckles on the same side of the shade sail. Do not put the two turnbuckles diagonally across from each other, they will just be pulling against each other and it will not properly tension your shade sail. 4) At this point, you could be finished installing your shade sail. But if there is still a wrinkle or if the shade sail is sagging, you can usually adjust this out with a couple of turns on one or both of your turnbuckles. Do not over tighten or completely close the turnbuckles because you will not be able to make future adjustments to keep the constant tension on the shade sail.
For a custom shade sail quote with or without your mounting point measurements, click Here: Shade Sail Quote Form
One last warning: Take down your shade sails in the winter if there is a chance that it may snow. Snow loads are the worst thing for shade sails and their longevity.
Building Approvals:
Prior to installation, check with local authorities for any relevant building regulations which may exist.
Selecting Mounting Hardware:
There is an extensive range of mounting hardware available to help you secure your shade sails. These accessories are readily available from your hardware supplier.

Chain, wire, or thick, strong rope can be used to extend your shade sail corner to an attachment point if required.
| Select the mounting hardware which best suit your own shade sail installation | ||
|---|---|---|
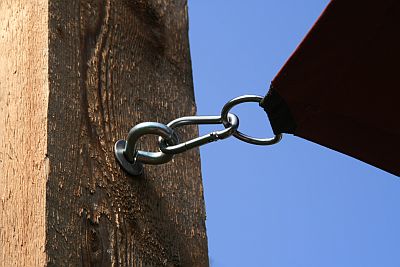
Spring Clip Connector | 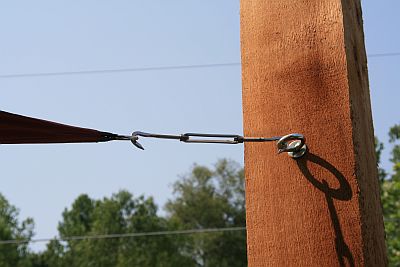
Turnbuckle Connector | 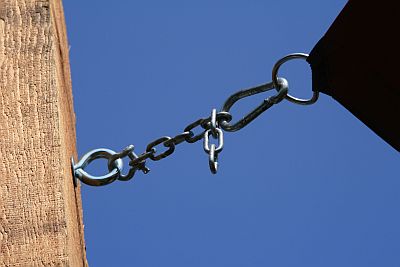
Chain Extension |
Attaching To Fascia:

If you intend to fix your shade sails to a fascia, the use of a Fascia Support is strongly recommended. The fascia support is used to connect the overhangs of rafters or trusses to fascia ledgers giving a strong connection between the two for improved strength.

Use with Metal Fascias | 
Use with Timber Fascias |
Shade Sail Post Supports:

(Click to Enlarge)
If shade sail posts are required, we recommend the use of a minimum 4 inch, schedule 40 steel pipe or 6 inch x 6 inch treated lumber (H5 level treatment). Hardwood of durability class 1 should also be used. Your local timber supplier can assist you in selection. Post lengths should be calculated taking into account the proposed height of your sail plus the depth of your footings. The footing depth should be 1/2 the length of the exposed pole. For example, if your post height is to be 10 feet, you would use a 15 foot long post with a footing depth of 5 feet (Usually if you are going 12 foot high or lower, around 4 feet deep will work.)
| Footings | |
|---|---|

| Measure out centers of footing positions and mark as illustrated. Dig holes at least 16 inches in diameter and to the depth required by the post height as described above. |
| Steel Post Footings | |
|---|---|

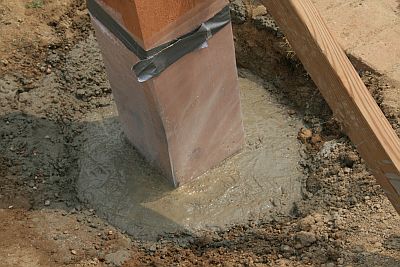
| Lay a 4 inch (100mm) depth of 3/4 inch diameter gravel at the base of the hole. Next, pour a 4 inch (100mrn) depth of concrete to provide a solid pad. Patio stones can be substituted in place of the poured concrete. Insert the post with a hold down bolt through the post to keep it secure. (see diagram) Pour the concrete footing and temporarily brace the posts until the concrete has set. |
| Wood Post Footings | |
|---|---|

| Lay a 4 inch (100mm) depth of 3/4 inch diameter gravel at the base of the post. Insert the posts using lag bolts partially driven into the post to hold it in place. Use string lines to ensure they are in plumb alignment. Temporarily brace the posts until the concrete has set. |
Concreting the Shade Sail posts:

Mix concrete in line with the manufacturer’s instructions. These will be labeled clearly on the packet. Your supplier will be able to give you any special advice you may require for your own conditions. Pour concrete to the top of the holes ensuring it is packed well. Ensure the concrete surface is sloping away from the posts to assist water drainage. Allow poles to set in concrete for a minimum of 48 hours. Brace if required.
Installation:
Connect mounting hardware to mounting points as required. Ensure all connections face towards the middle of the sail and are tightly secured. Check again to ensure all mounting points are solid. Lay your shade sail out and commence the installation.
Tensioning:
Using the selected mounting hardware, commence connecting the corners of the shade sail to the attachment points.

Tension Required | 
Tension Correct |
A properly mounted and tensioned shade sail will have approximately 100 pounds of tension on it and will have few to no wrinkles. Connect all points, using rope or wire cable if necessary, to gain increased leverage. The rope can be threaded around a number of times so that it works as a “pulley” mechanism. Another tensioning method would be to use a turnbuckle which can aid in applying the proper amount of tension. Stop tensioning when the shade sail is rigid with few or no creases. CAUTION: Do not over tension. Tension only by hand and only tight enough to get the wrinkles out of the shade cloth. Re-tension periodically if required.
Warning:
Your shade sail is designed to provide UV protection and comfort in domestic areas. When selecting the position for your shade sail, ensure all attachment points are structurally sound and secured. Inspect regularly. Prior to installing, consult your local council regarding building regulations which may apply in your area. Exposure to certain chemicals, e.g. Chlorine, can lead to the premature breakdown of the fabric. Chemicals to be used on or around the fabric should be referred to MightyCovers.com prior to their use. Do not have fire or an open flame close to the fabric. Do not use your barbecue under the shade structure.
Care Instructions:
Your shade sails may be cleaned at any time using a solution of mild detergent and water. Apply the solution with a sponge or a very soft brush. Let the solution stand on the fabric for 10 minutes and rinse thoroughly with water from your garden hose. DO NOT put the fabric in your washing machine, clothes dryer, or scrub it with a stiff brush, scouring pad, or an abrasive cleaner. The above is intended as a guide only and not the actual instructions for installing your shade sail. Please read and follow the manufacturer’s instructions as it pertains to your particular shade sail.
Related products


